Rotate that planet
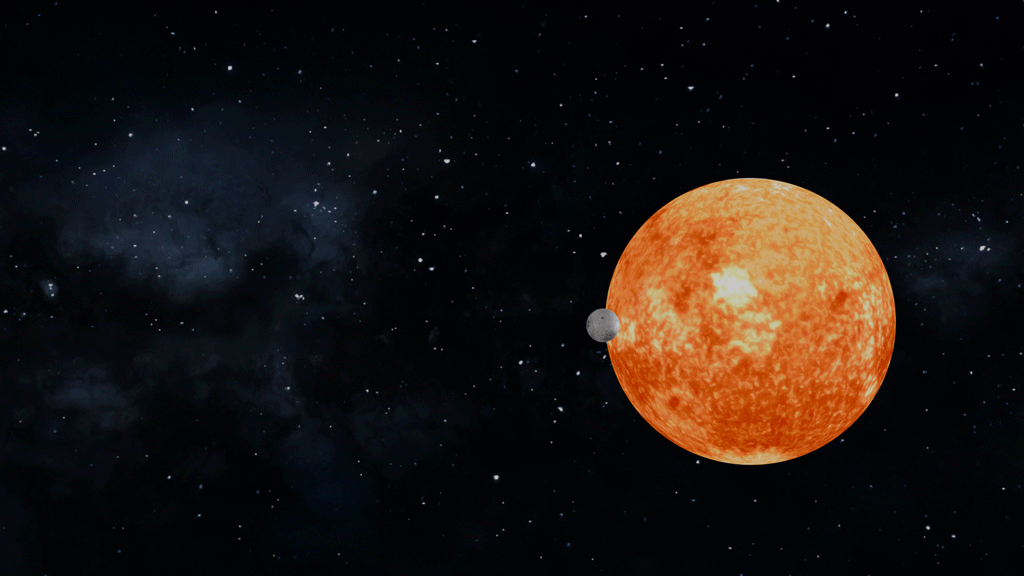
In this section we will start with rotating a planet while in the next we will implement some physics to simulate the motion of a planet. Within Geometry Nodes we will use a Simulation Zone to quickly iterate over frames and easily make animations. For example see the animated gif in Fig. 1.
The rotation you see in Fig. 1 is generated using the Transform Geometry Node (see Fig. 2). The Transform Geometry Node nicely combines the options to translate, rotate and scale the geometry. In Fig. 2 you also see we placed the Transform Geometry Node inside a Simulation Zone. This way you can generate an animation really easily using Geometry Nodes.
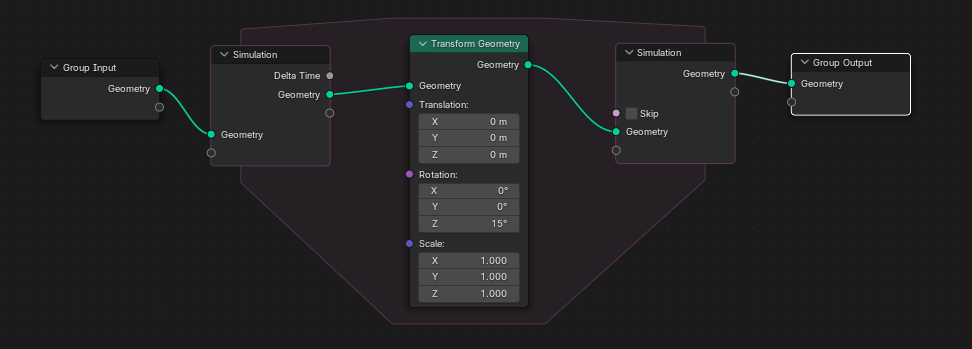
Lets break down the Simulation Zone for a moment. As you can see in Fig. 2 the Simulation Zone consists out of two nodes, one input and one output, and an marked area in between them. How it works is that the geometry from the previous frame is entered at the left input Simulation node and you can do stuff with it in the marked zone. Then you pass the geometry into the right Simulation node and in the next frame you can continue with the geometry. And this way it iterates over frames and executes the nodes in the Simulation Zone every frame. When the animation starts the simulation zone starts with the input given to the input node. In Fig. 2 we take the geometry coming from the Group Input and give it to the Simulation Zone to start with at the first frame. The output sockets of the output node of the Simulation Zone gives you the geometry at every frame In our example in Fig. 2 this is connected to the Group Output, so we see the geometry and how it changes at every frame.
Applying changes
When using simulations zones, when you make changes to the node tree, you often need to slide the animation head back to frame 1 in order for the changes to take effect.
When you have implemented this Geometry Node setup like in Fig. 2, you can go to the 3D view, set the animation timeline to frame zero and press play (or press the space bar on your keyboard). Blender now calculates the geometry at every frame using the Geometry Nodes and you will hopefully see a nice animation!
💻 Exercise: Rotation
a) Implement the Geometry Node setup as seen in Fig. 2. You can use any type of object, a sphere with a texture or cube, as long as you can see its rotation.
b) Now besides a rotation, also give the object a translation. You can do this with the same Transform Geometry node as is used for the rotation. Describe the motion of the object when it is both affected by a rotation and a translation. Would you conclude that the Transform Geometry node works on the global or local coordinates of the object?
Links
- For the textures of the planets I have used the beautiful textures from the Solar System Scope project which are based on NASA images.